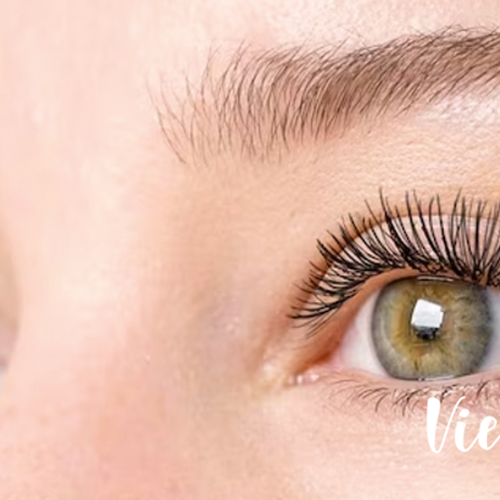
Well-groomed eyebrows can make a big difference in how you look. They frame your face and can enhance your natural beauty. In this guide, we'll share simple tips for beginners on how to groom your eyebrows. You'll learn about the tools you need, how to find your perfect shape, and easy steps to trim, tweeze, and fill in your brows. By the end, you'll know how to keep your eyebrows looking great with minimal effort. Let's get started on your journey to perfect brows!
Step 1: Identify Your Natural Shape
When it comes to eyebrow grooming, the first step is identifying your natural shape. Your brows can enhance your facial features and give you a polished look, but to achieve this, you need to work with what you already have. Here’s how to find your natural eyebrow shape and determine the best brow shape for your face.

How to Find Your Natural Eyebrow Shape
Start with Clean Brows: Before identifying your natural shape, make sure your eyebrows are clean and brushed. Use an eyebrow brush to comb the hairs upward and outward. This will reveal the natural growth pattern.
Locate Your Starting Point: Use an eyebrow pencil to find where your brow should start. Hold the pencil vertically against the side of your nose and mark the spot where it intersects your brow. This is the ideal starting point.
Determine the Arch: To find the highest point of your arch, place the pencil against the side of your nose and angle it to pass through the outer edge of your iris (the colored part of your eye). Mark this spot on your brow.
Find the End Point: Finally, to determine where your brow should end, place the pencil against your nose and angle it to the outer corner of your eye. Mark the point where the pencil meets your brow. This is where your eyebrows should naturally end.
Connect the Dots: Use these marks as a guide to outline your brow shape. This will give you a clear idea of your natural eyebrow shape.
Determine the Best Brow Shape for Your Face
Determining the best brow shape for your face is crucial because it enhances facial features, frames your face, and affects your overall expression. Finding the best brow shape often involves considering your face shape, eye shape, and personal style. The right shape can create balance, accentuate your eyes, and highlight your bone structure, which not only boosts your appearance but also your confidence. Properly shaped brows can minimize imperfections, complement makeup, and contribute to a more harmonious and flattering look, making it a key aspect of personal grooming and style.
Related Article: Find Out Which Eyebrow Shape Is Best For You
Step 2: Gather Your Tools
Before you dive into eyebrow grooming, it's important to gather the right tools. Here's a list of necessary tools and their use:

Tweezers
Small, handheld tools with flat or pointed tips used for plucking stray hairs. They allow you to remove individual hairs precisely, helping you shape your eyebrows neatly.
Small Scissors
Small, sharp scissors designed specifically for trimming eyebrows. They help keep your brows looking neat and tidy.
Eyebrow Brush
Small brush with firm bristles, often double-sided with a comb on one side. Used to shape your brows and to brush hairs upward before trimming. It also helps blend in eyebrow pencil or powder for a natural look.
Eyebrow Pencil
Makeup tool with a fine tip, available in various shades to match your natural brow color. Used to fill in sparse areas and define the shape of your brows. They provide a precise application for a polished look.
Brow Gel
Product that comes in a small tube with a mascara-like wand. It helps set your eyebrows in place, keeping them neat throughout the day. Tinted gels can also add color and make your brows look fuller.
Why These Tools Matter
Having the right tools makes a significant difference in eyebrow grooming. Each tool has a specific purpose that contributes to achieving well-groomed, natural-looking eyebrows. Using tweezers and scissors ensures that your brows are neat and tidy, while the brush, pencil, and gel help define and set them perfectly.
Step 3: Prepare Your Brows

Clean Your Face and Brows
Use a gentle cleanser to wash your face thoroughly. This removes any dirt, oil, and makeup, giving you a clean base to work with. Gently scrub your eyebrow area with the cleanser to ensure there’s no residue. This helps prevent irritation during grooming. Rinse your face with lukewarm water and pat dry with a clean towel.
Soften the Skin
Soak a washcloth in warm water, wring out the excess, and place it over your eyebrows for a few minutes. The heat opens up the pores and softens the hair follicles, making plucking less painful. Apply a gentle exfoliating scrub around your eyebrows to remove dead skin cells. This step also helps to prevent ingrown hairs. After exfoliating, apply a small amount of aloe vera gel to your eyebrows. Aloe vera soothes the skin and provides extra moisture, making the skin softer and more pliable for plucking.
Brush Your Brows
Brush your brows upward and outward using an eyebrow brush. This will help you see the natural shape of your brows and identify any areas that need to be trimmed or tweezed.
Step 4: Trim Long Hairs

Trim Carefully:
Holding the brush in one hand, keep the brow hairs brushed upward. With the other hand, take the small scissors and trim any hairs that extend beyond the natural shape of your eyebrow. Trim a little at a time to avoid cutting too much.
Check for Symmetry:
After trimming one brow, check it against the other. Make any necessary adjustments to ensure both eyebrows look even.
Final Brush:
Brush your eyebrows again to see the final result. Make sure no long hairs are sticking out.
Step 5: Tweeze with Care
When plucking stray hairs, make sure you have good lighting. Natural light is best to see even the finest hairs. Use a magnifying mirror if needed, but don’t get too close. It can make it hard to see the overall shape.

Tweeze Stray Hairs First
Start by removing stray hairs outside the outlined shape. Pull the skin taut with one hand and tweeze hairs in the direction of growth with the other hand. This reduces pain and avoids breaking the hair.
Work Slowly and Symmetrically
Take your time and tweeze a few hairs at a time from one eyebrow, then switch to the other. This helps keep them symmetrical. Step back and check your progress frequently to ensure you’re not over-plucking.
Remove Hairs from Below the Brow
Focus on tweezing hairs from below the brow line. Avoid plucking from above, as it can disrupt the natural shape. Keep your natural arch in mind and don’t try to create a new one.
Avoid Over-Plucking
Limit your tweezing session to 10-15 minutes to avoid getting carried away. Stick to your natural brow shape and avoid drastic changes. Remember, you can always tweeze more later, but you can’t put hairs back once they’re gone.
Soothing Your Skin
After tweezing, soothe your skin with a cool compress or aloe vera gel to reduce redness and irritation.
Step 6: Define Your Brows

Choose the Right Product
Opt for a pencil with a fine tip for precise application. Choose a shade that matches your natural brow color or is slightly lighter for a softer look. If you prefer a softer, more diffused look, eyebrow powder is a great option. Select a shade that matches your brow color closely.
Outline Your Brows
Using light, feathery strokes, outline the bottom and top edges of your eyebrows with the pencil. Follow the natural arch of your brows. This step creates a guideline for filling in sparse areas.
Fill in Sparse Areas
Using the same light strokes, fill in the sparse areas of your eyebrows. Focus on areas where hair is scarce or where you want to create more definition. Start from the inner corners and work your way outward.
Blend with a Spoolie
Once you’ve filled in the brows, use a clean spoolie brush to blend the pencil or powder into your natural brow hairs. This helps soften any harsh lines and ensures a more natural appearance.
Step 7: Set Your Brows

Apply Brow Gel (Optional)
To keep your brows in place throughout the day, apply a clear or tinted brow gel. Brush the gel through your brows in the direction of hair growth.
Tips on Choosing Between Clear and Tinted Brow Gel
Clear Brow Gel: Ideal for a natural look or if you have already filled in your brows with a pencil or powder. Clear gel sets your brows without adding any additional color. It's perfect for everyday wear and suits all brow colors.
Tinted Brow Gel: Offers both hold and color in one product. Choose a shade that matches your brow hair for a subtle enhancement or a shade darker for more definition. Tinted gels can help fill in sparse areas and provide a more polished look without needing additional products.
Combination Approach: If you have particularly unruly brows or sparse areas, you can use both clear and tinted brow gel. Start with clear gel to shape and set your brows, then apply tinted gel to add color and further define your brows.
Step 8: Maintenance
Brow Growth Magic: For those with sparse brows, consider brow growth serums to promote thicker, fuller arches. See recommended product by the end of this blog.

Regular Maintenance: Aim to groom your eyebrows every 2-4 weeks to keep them tidy and in shape. Avoid over-plucking, as this can cause thinning and damage to your brows.
Consult a Professional: If you're unsure about shaping your eyebrows, consider visiting a professional eyebrow stylist for advice and maintenance.
Eyebrow grooming doesn’t have to be overwhelming. By following these simple steps, you can achieve well-defined brows that complement your facial features and enhance your overall appearance. With a little practice and the right tools, you'll master the art of eyebrow grooming and enjoy beautifully shaped brows every day.
Recommended Product:
VieBeauti Eyebrow Growth Serum


0 comments